Sidebars help enhance your WordPress site by adding widgets like recent posts, categories, social counters, or custom content. This guide will show you how to create a custom sidebar and easily add it to your page using the theme’s page builder.
Step 1: Access the WordPress Dashboard
- Log in to your WordPress Admin Dashboard.
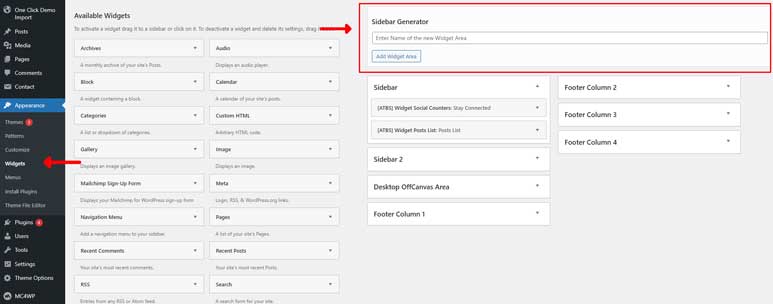
- From the left-hand menu, go to Appearance > Widgets.
- You’ll now be in the Sidebar & Widgets Settings panel. On the left side, you’ll see the available widgets, and on the right side, you’ll find the Sidebar Generator Tool along with the theme’s default sidebars.
Step 2: Create a Custom Sidebar
If you want to create a custom sidebar instead of using the default ones, follow these steps:
- In the Widgets section, locate the Sidebar Generator tool (highlighted in the red rectangle in the image above).
- Enter a name for your new sidebar (e.g., “Custom Sidebar for Pages”), then click the Add Widget Area button to create it.
- Drag and drop the widgets from the left side into your newly created sidebar.
Step 3: Assign the Sidebar to a Page Using the Theme’s Page Builder
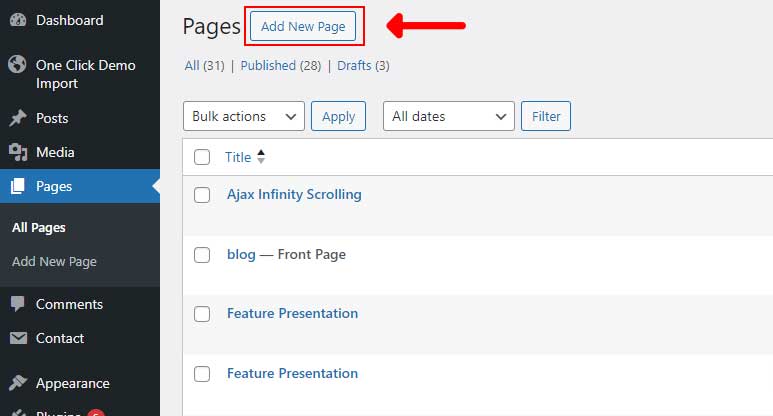
- Create a New Page
Begin by adding a new page in your WordPress dashboard.
- Set the Page Name and Choose the Template
Enter a name for your page and select the “Pagebuilder” template from the available options.
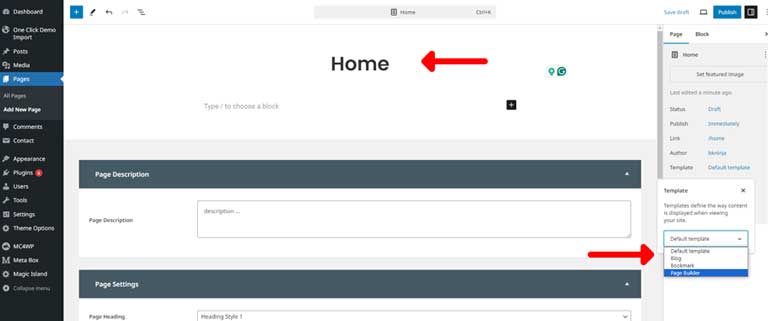
- Access the Pagebuilder Panel
Once you select the “Pagebuilder” template, the Pagebuilder Panel will appear, displaying various options for customization.
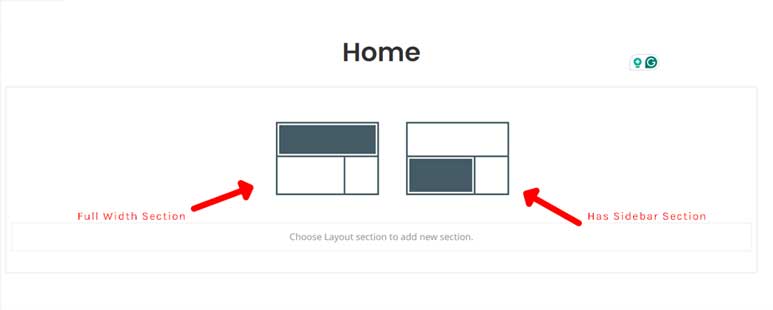
- Add a Has Sidebar Section to the Page
Once you add the Has Sidebar section to the page, expand its settings panel. On the right side, you’ll find options to select a sidebar and another option to choose its position, as highlighted in the image below.
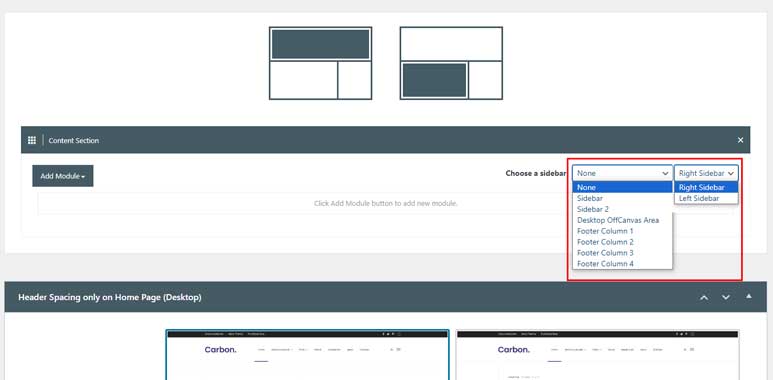
After selecting your sidebar and its position, be sure to save the page for the changes to take effect.