How to Set Up Megamenu in the Carbon Theme
The Carbon Theme for WordPress includes a powerful Megamenu feature that is available exclusively for the Main Menu. This feature is designed to enhance your site’s navigation by allowing you to create advanced dropdown menus with various styles. The Megamenu can be used for category items and offers six distinct styles and a column menu. Below, you will find a complete guide to setting up the Megamenu in the Carbon Theme.
Step 1: Access the WordPress Dashboard
- Log in to your WordPress site.
- Navigate to Appearance > Menus.
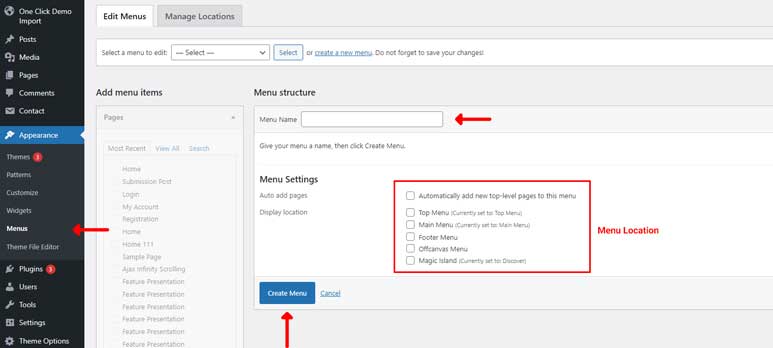
Step 2: Create or Select the Main Menu
- If you haven’t created a menu yet, click on the Create a new menu link.
- Name your menu (e.g., Main Menu) and click the Create Menu button.
- Ensure the menu is assigned to the Main Menu location by checking the Main Menu box in Menu Settings and clicking Save Menu.
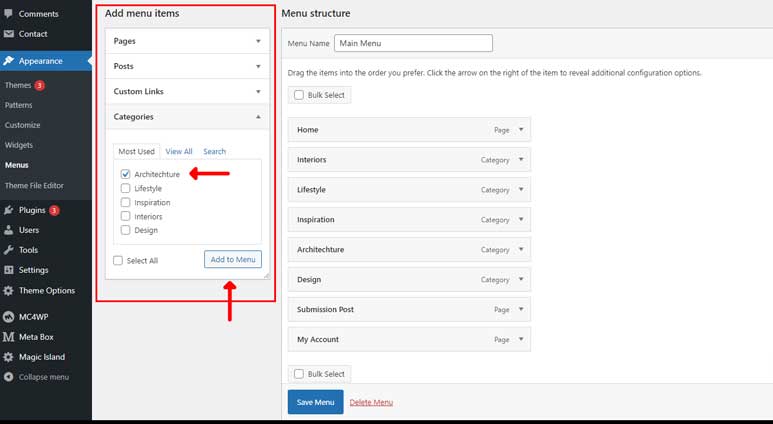
Step 3: Add Items to the Menu
- On the left side, you will see sections like Pages, Posts, Custom Links, and Categories.
- Check the boxes next to the items you want to add to your menu (e.g., categories for Megamenu).
- Click the Add to Menu button to add the selected items to your menu.
- Arrange the menu items by dragging them into your desired order. Sub-menu items can be created by dragging items slightly to the right under a parent item.
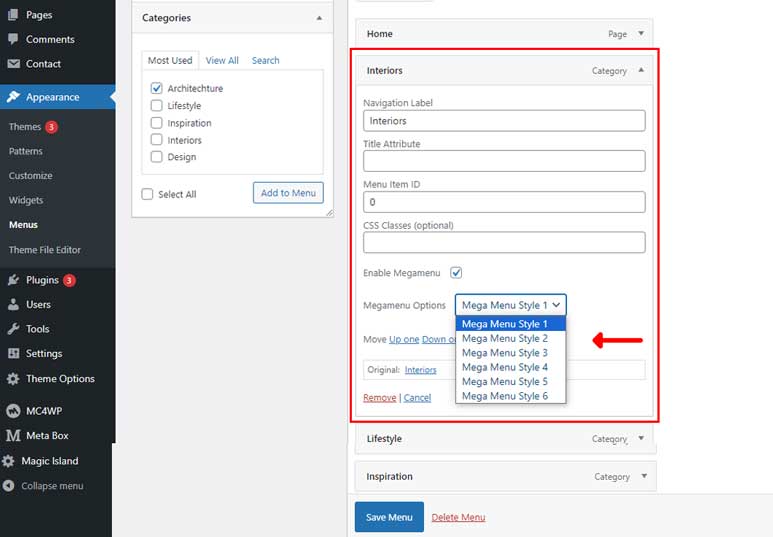
Step 4: Enable and Customize the Megamenu
- Click the downward arrow on the right side of a category menu item to expand it.
- In the Megamenu Settings section, you will see options to select the Megamenu style.
- Choose one of the six Megamenu styles. You can refer to the demo for each style here.
- Customize the selected Megamenu style according to your needs.
Step 5: Save Your Menu
After configuring the Megamenu settings, click Save Menu to apply the changes.
There is another type of Mega Menu called the Column Mega Menu. You can follow this instruction to create it.