Step-by-Step Guide to Create a Menu in the Carbon Theme
Step 1: Access the WordPress Dashboard
- Log in to your WordPress site.
- From the dashboard, navigate to Appearance > Menus.
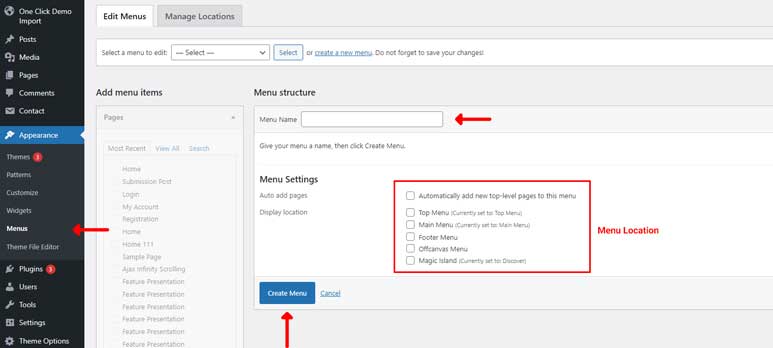
Step 2: Create a New Menu
- Click on the Create a new menu link.
- Name your menu (e.g., Main Menu, Top Menu) and click the Create Menu button.
Step 3: Add Items to the Menu
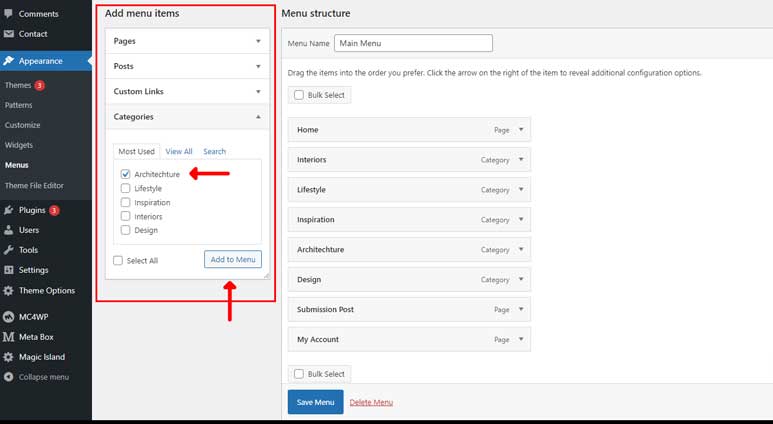
- On the left side, you’ll find sections such as Pages, Posts, Custom Links, and Categories.
- Check the boxes next to the items you want to add to your menu. This can include pages, blog posts, custom links (like an external website), and categories.
- Click the Add to Menu button to add the selected items to your menu.
Step 4: Arrange Menu Items
- Drag and drop menu items to arrange them in your desired order.
- To create a sub-menu item, drag an item slightly to the right under the parent item.
Step 5: Assign the Menu to a Location
- Below the menu structure, you’ll find Menu Settings with different menu locations:
- Top Menu
- Main Menu
- Footer Menu
- Offcanvas Menu
- Magic Island
- Check the box next to the location where you want the menu to appear. For example:
- Top Menu for a menu at the top of your site.
- Main Menu for the primary navigation menu.
- Footer Menu for a menu in the footer area.
- Offcanvas Menu for a menu in Offcanvas Menu Panel
- Magic Island for a menu in Magic Island Panel
- Click Save Menu to save your changes.
Step 6: Customize Menu Items (Optional)
- Click the downward arrow on the right side of each menu item to expand it.
- Here, you can change the navigation label, add a title attribute, or remove the item.
- You can also add CSS classes for custom styling if needed. Enable CSS classes by clicking the Screen Options tab at the top right and checking the CSS Classes option.
Additional Tips for Carbon Theme
Mega Menus: The Carbon Theme supports mega menus, you can create advanced dropdown menus. Check the instructions here for specific instructions on setting up mega menus.